CoCo Server 部署 RAG,使用 Notion 作为语料库(上)
启动 Easysearch,这里把 Easysearch 作为语料库,把 notion 的素材存在 Easysearch
启动 ollama,使用 LLM 进行推理
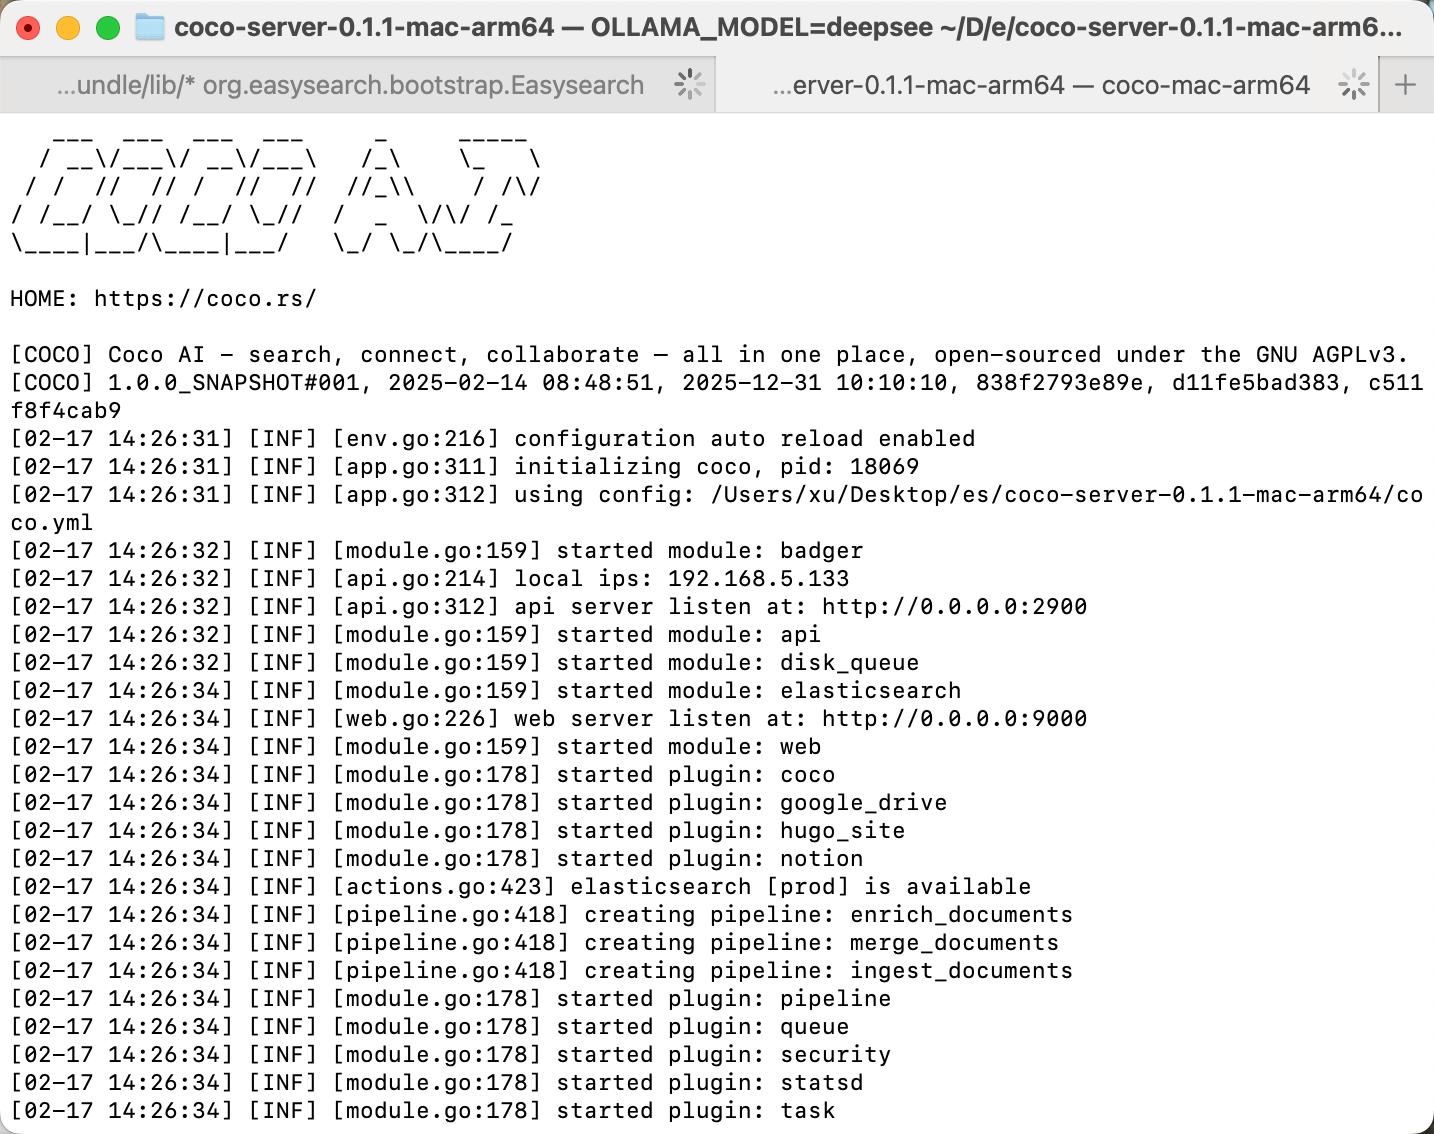
启动 Coco Server,端口在 9000
Coco App 连接 Sever,输入输入
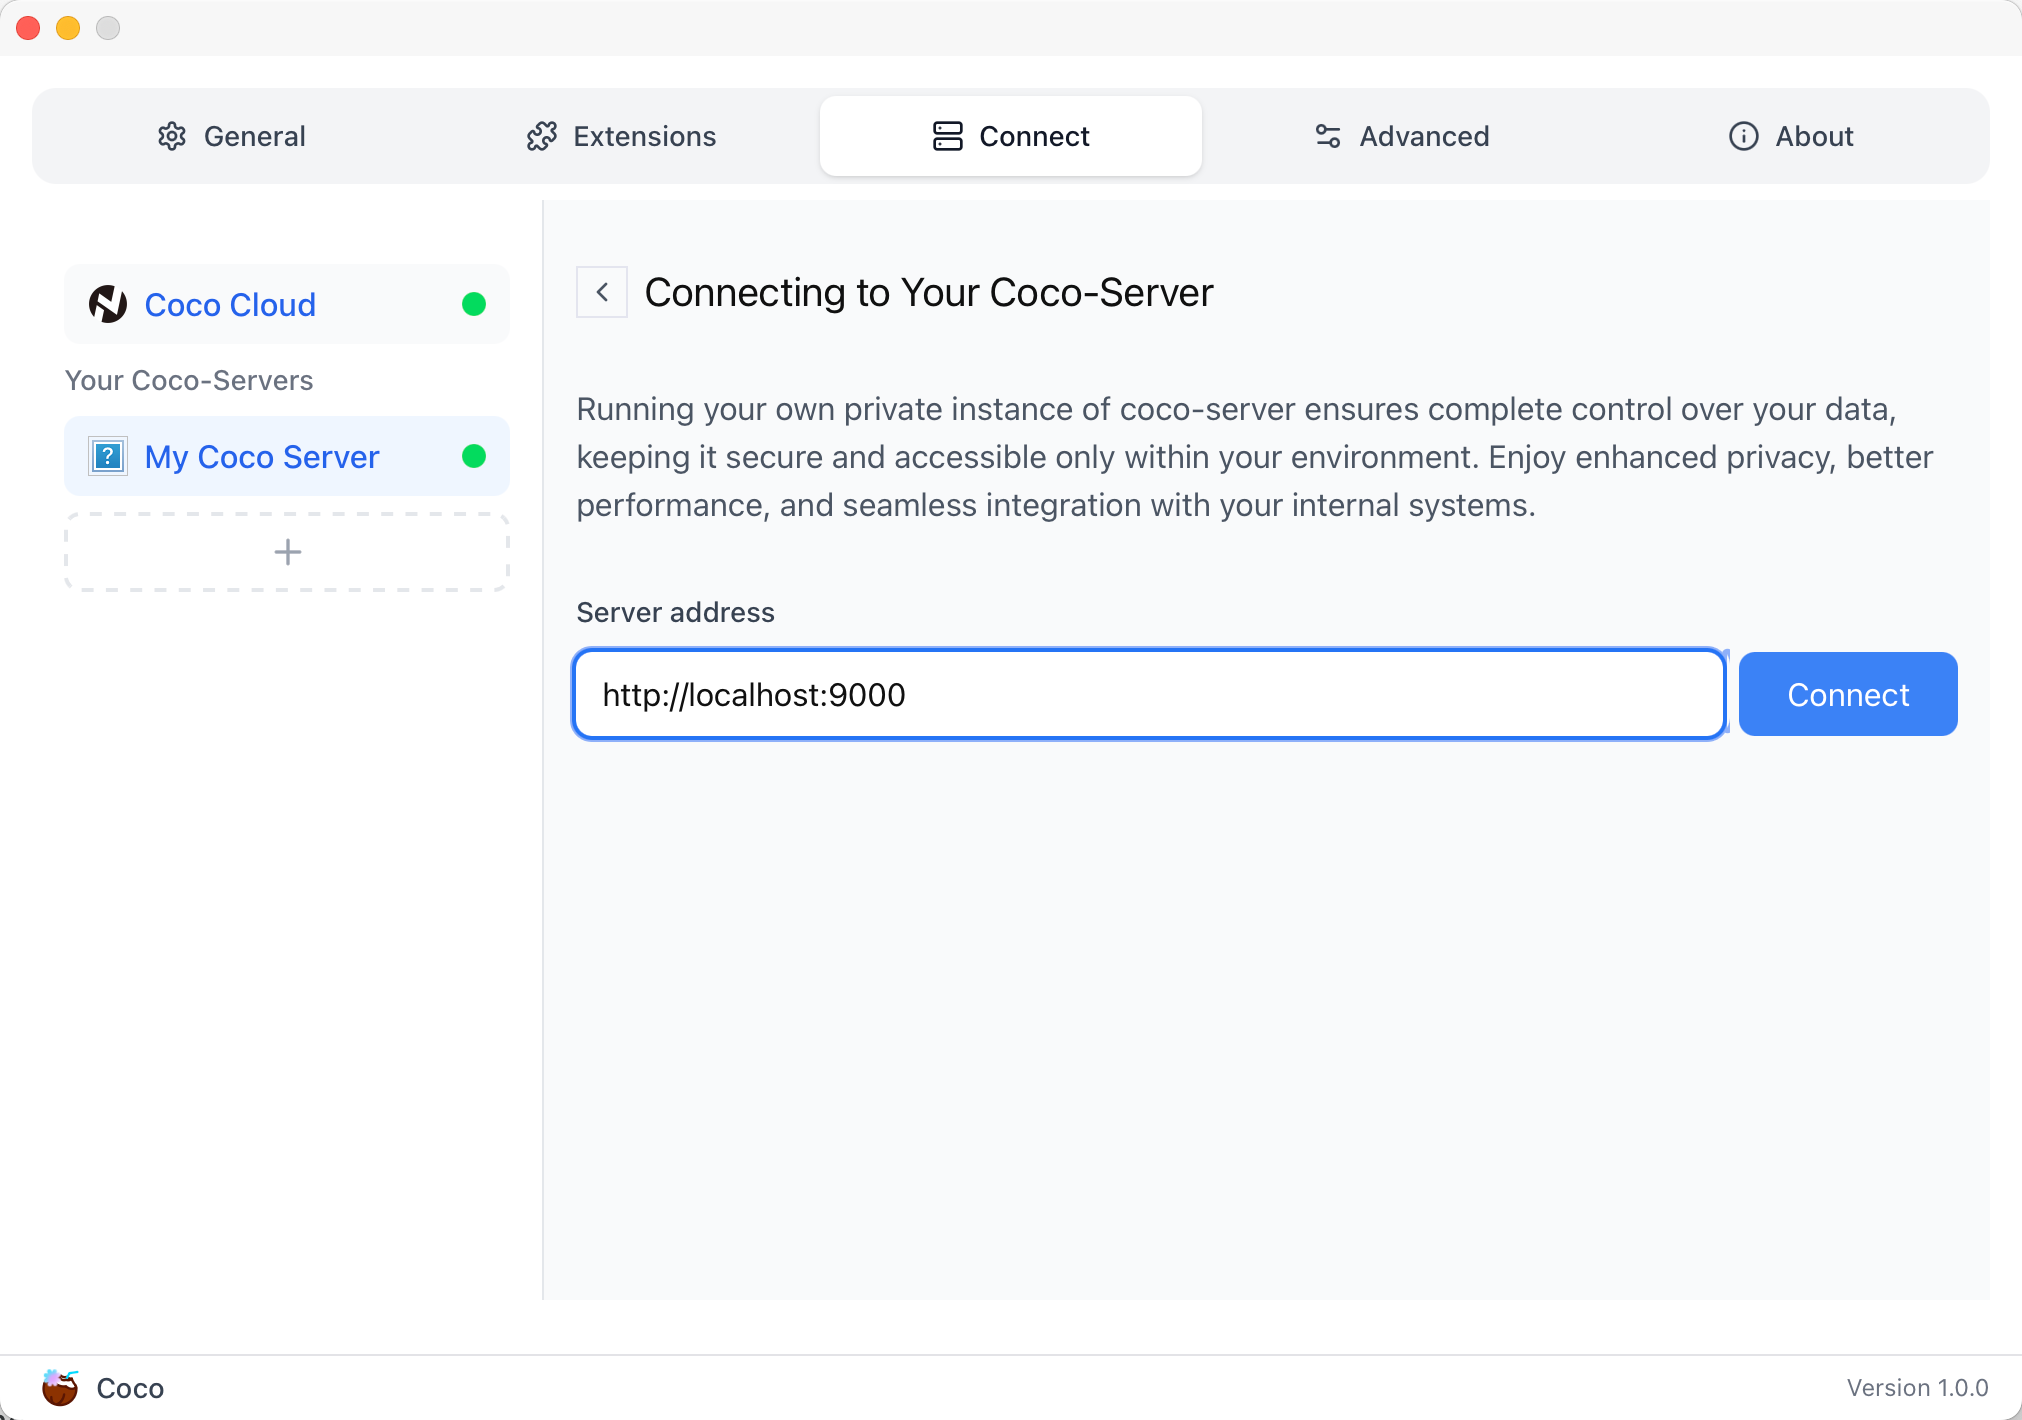
登录自己 server,依旧使用 Github 登录

Github 登录之后的重定向,我们目前需要抓取最后的, 后面用这个 token 换取访问 Coco Server AI 的 key:
coco://oauth_callback?code=cupibub55o1cfqbveps0q804ai6aj14in3u91xjhvuk8s7ixirjsq2j9mmyyeut91nmgjwz0b494ngpk&request_id=eb94762b-f054-4710-9c6cf20889d3&provider=coco-cloud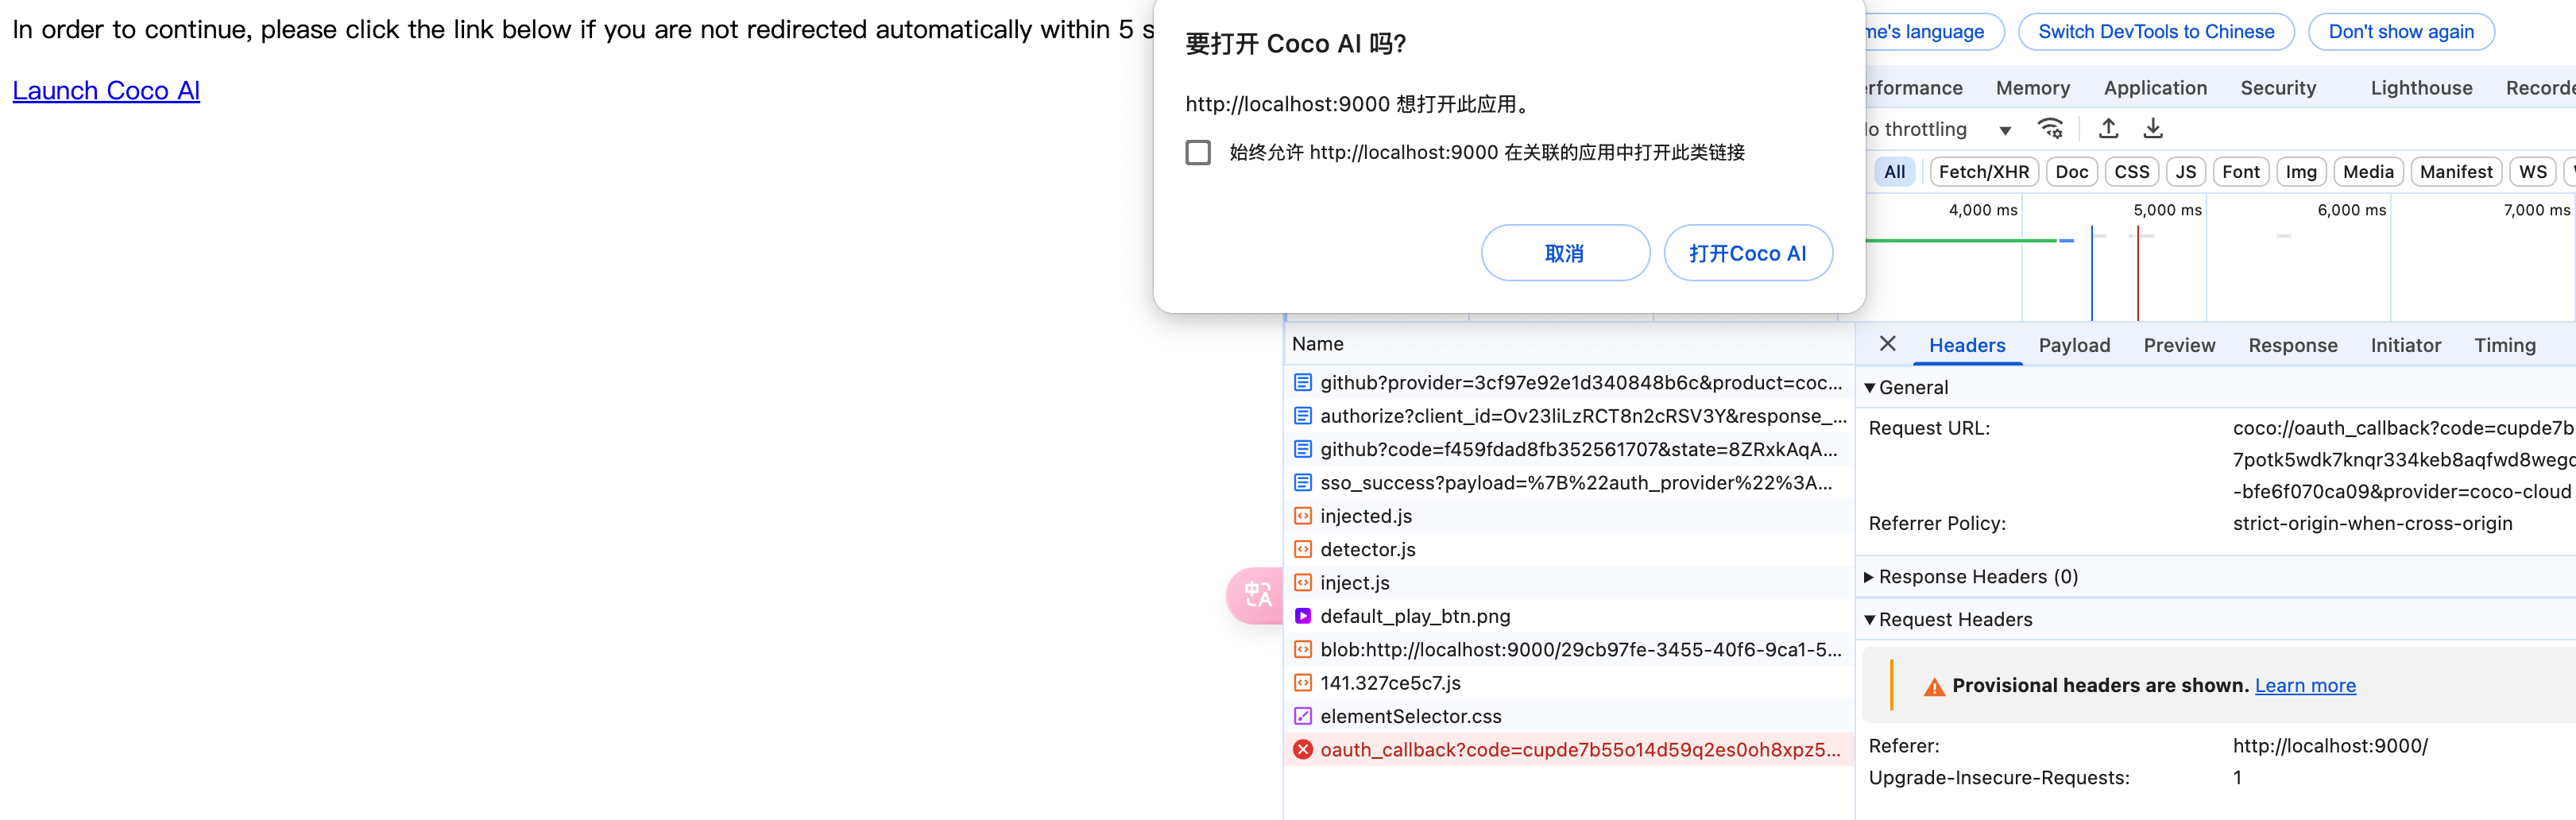
认证步骤如下:
会返回一个 Token,记录下来,这个是只是临时的, 如 XXABC
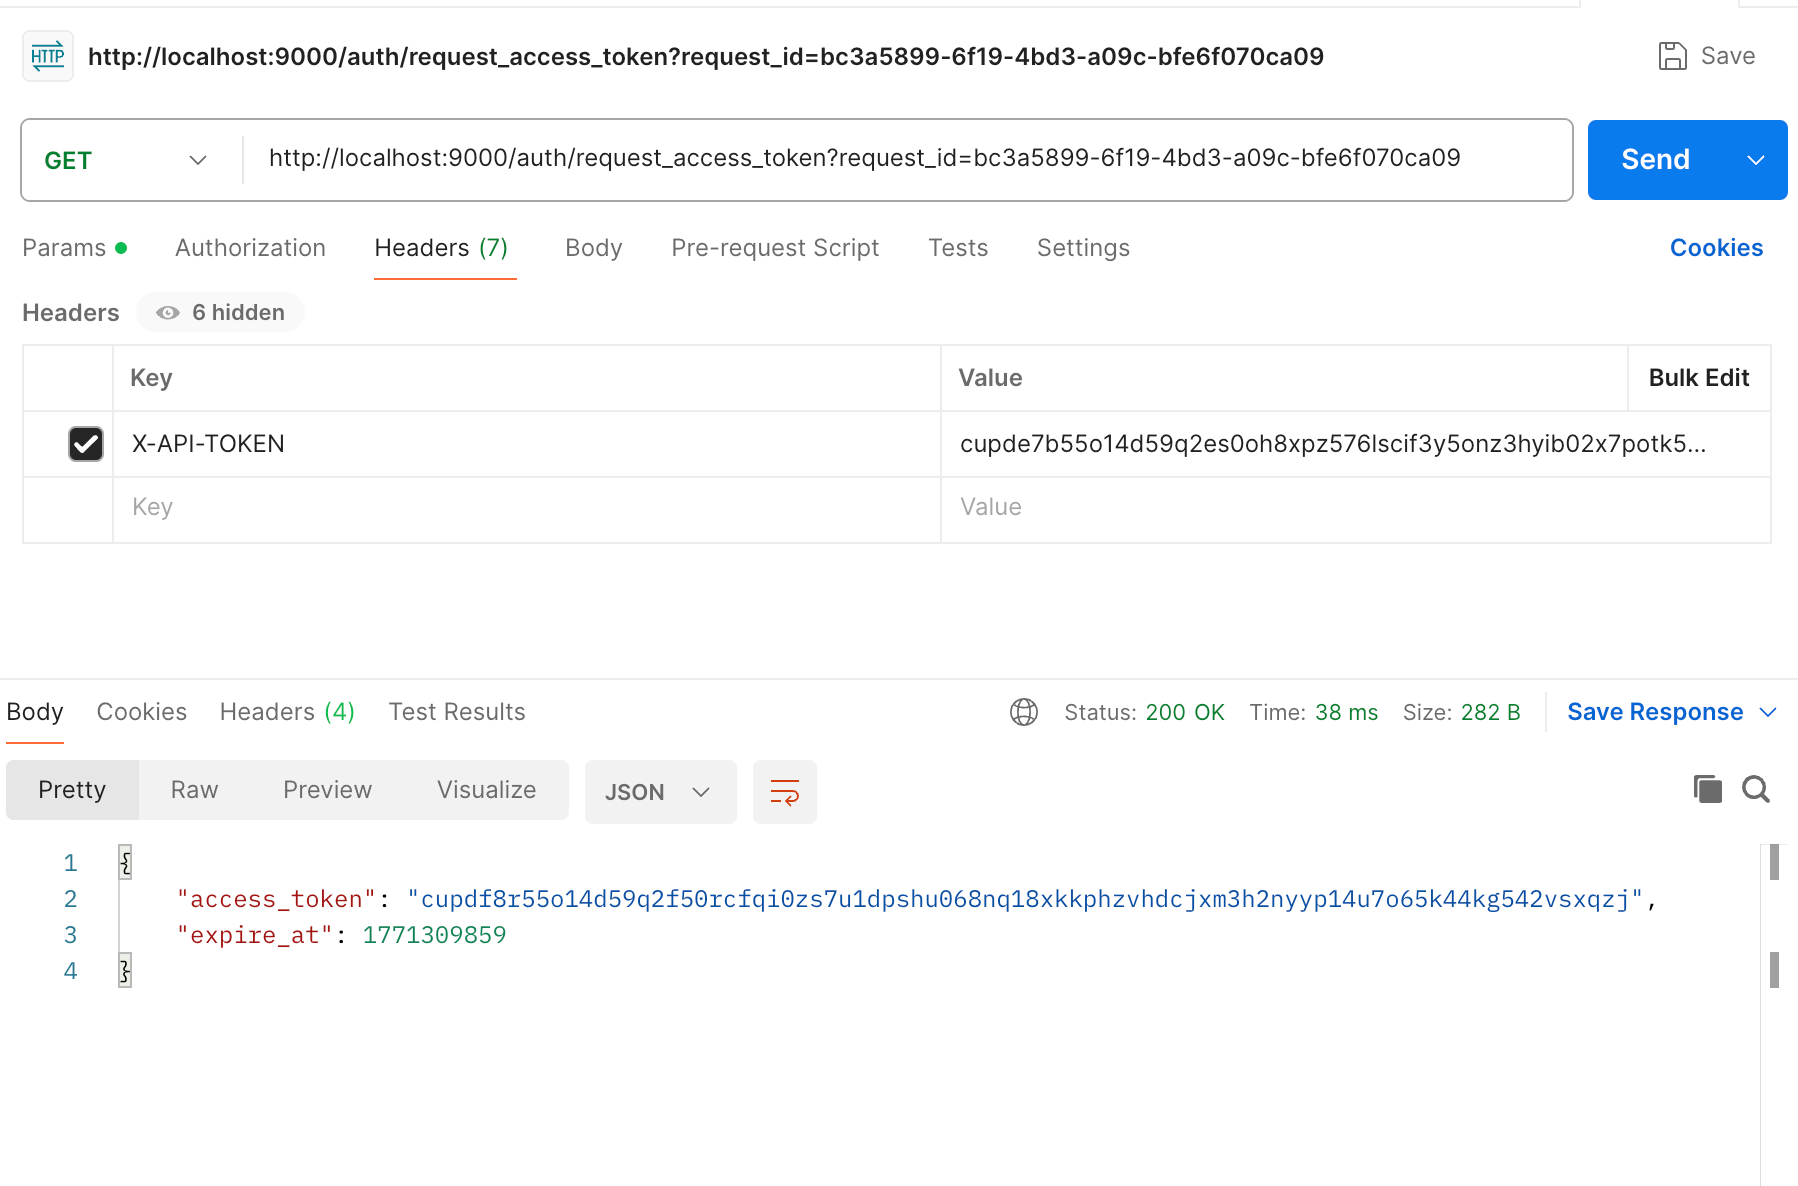
第二步: curl -H'X-API-TOKEN: XXABC' "http://localhost:9000/auth/request_access_token?request_id=dd9825e1-ebd3-4c84-9e3f-7ccb0421c508"
返回的才是你要的 Token
在 postman 中换 token,得到 access_token 和过期时间:
python
import requests
def parse_oauth_callback(url):
query_params = {param.split('=')[0]: param.split('=')[1] for param in url.split('?')[1].split('&')}
code = query_params.get("code")
request_id = query_params.get("request_id")
return code, request_id
def request_access_token(code, base_url, request_id):
url = f"{base_url}/auth/request_access_token?request_id={request_id}"
headers = {"X-API-TOKEN": code}
response = requests.get(url, headers=headers)
return response.json()
# 示例输入
oauth_callback_url = """
coco://oauth_callback?code=cupibub55o1cfqbveps0q804ai6aj151wu4in3u91xjhvuk8s7ixirjsq2j9mmyyeut91nmgjwz0b494ngpk&request_id=eb94762b-f054-4710-9c6a-0cf2088729d3&provider=coco-cloud
"""
base_url = "http://localhost:9000"
# 解析 code 和 request_id
code, request_id = parse_oauth_callback(oauth_callback_url)
# 发送请求
token_response = request_access_token(code, base_url, request_id)
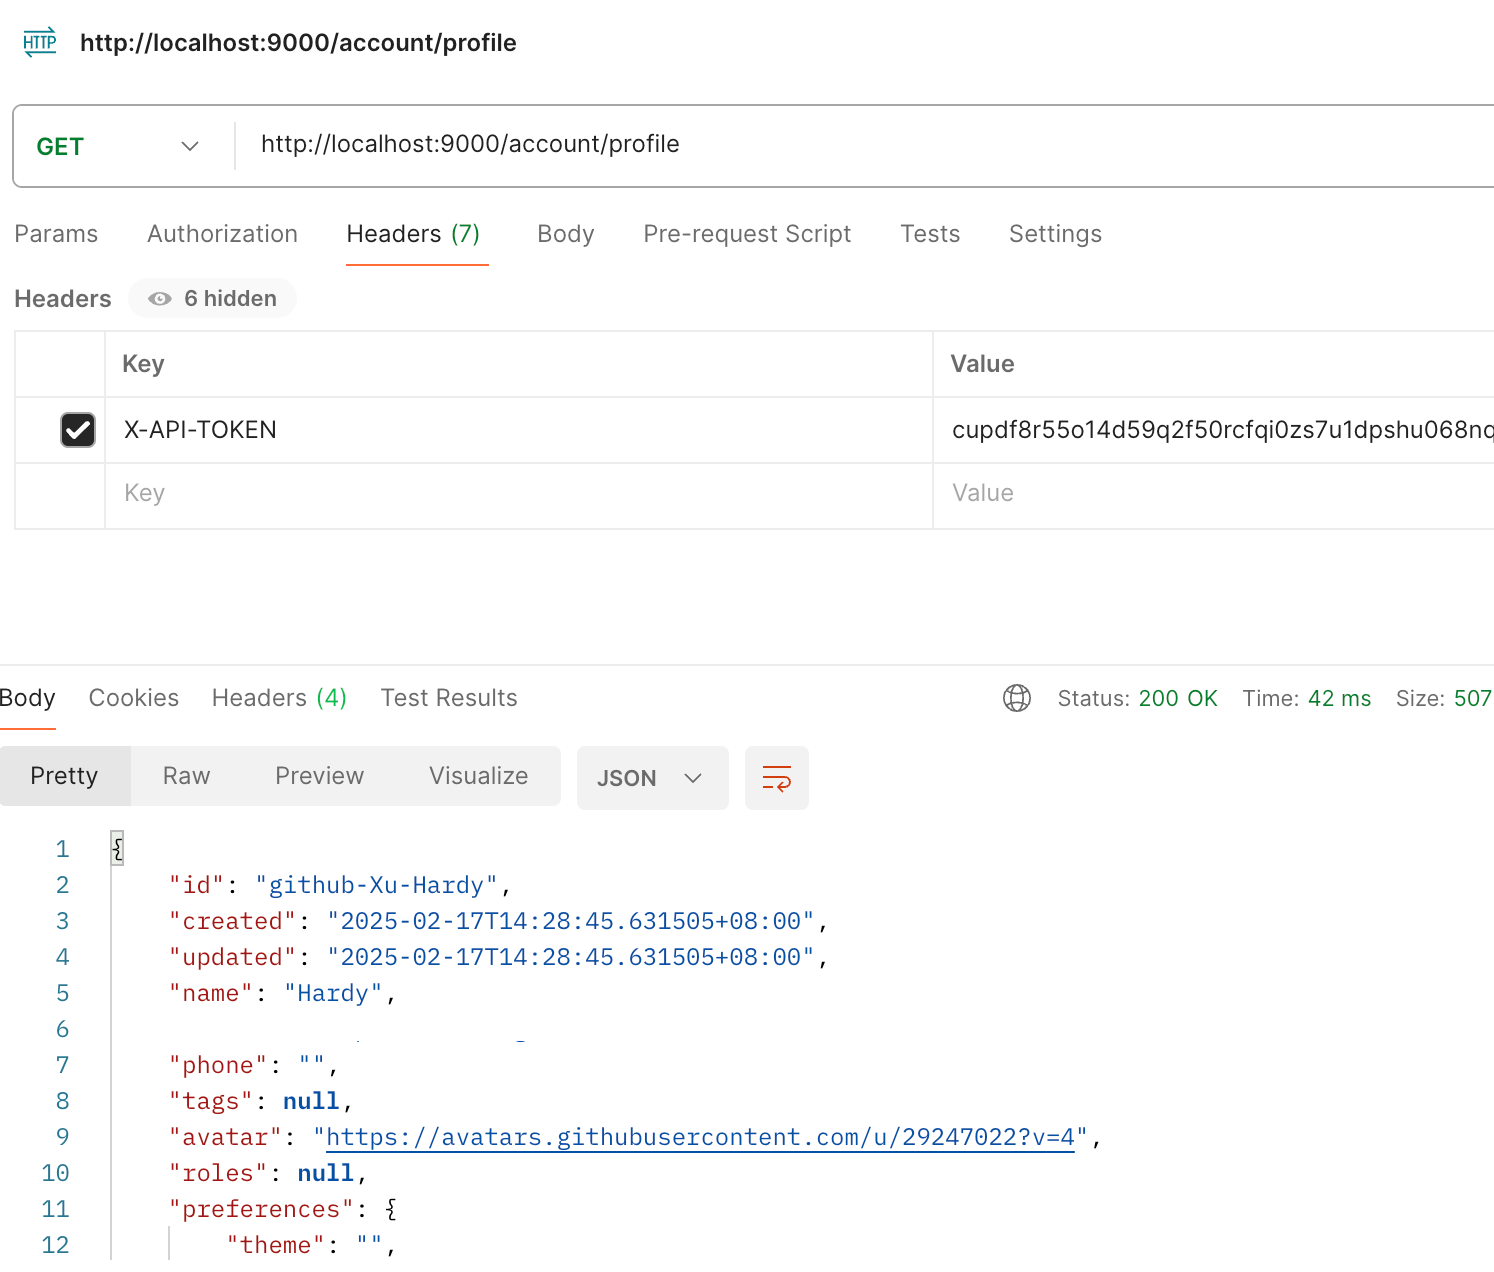
print(token_response)可以用 access_key 查看用户信息:
python
import requests

url = "http://localhost:9000/account/profile"

payload = {}
headers = {
  'X-API-TOKEN': 'cupichb55o1cfqbveq90zwomyxs791ul3esbxxt480c8dzgvdtjtvmcnsld4a5v0wvx9l9ofcf1'
}

response = requests.request("GET", url, headers=headers, data=payload)

print(response.text)
注册 Notion connector:
python
import requests
import json
def update_connector(base_url, api_token, connector_name, data):
url = f"{base_url}/connector/{connector_name}?replace=true"
headers = {
"X-API-TOKEN": api_token,
"Content-Type": "application/json"
}
response = requests.put(url, headers=headers, data=json.dumps(data))
return response.json()
base_url = "http://localhost:9000"
api_token = "<token>"
notion_data = {
"name": "Notion Docs Connector",
"description": "Fetch the docs metadata for notion.",
"icon": "/assets/connector/notion/icon.png",
"category": "website",
"tags": ["docs", "notion", "web"],
"url": "http://coco.rs/connectors/notion",
"assets": {
"icons": {
"default": "/assets/connector/notion/icon.png",
"web_page": "/assets/connector/notion/icon.png",
"database": "/assets/connector/notion/database.png",
"page": "/assets/connector/notion/page.png"
}
}
}
response_notion = update_connector(base_url, api_token, "notion", notion_data)
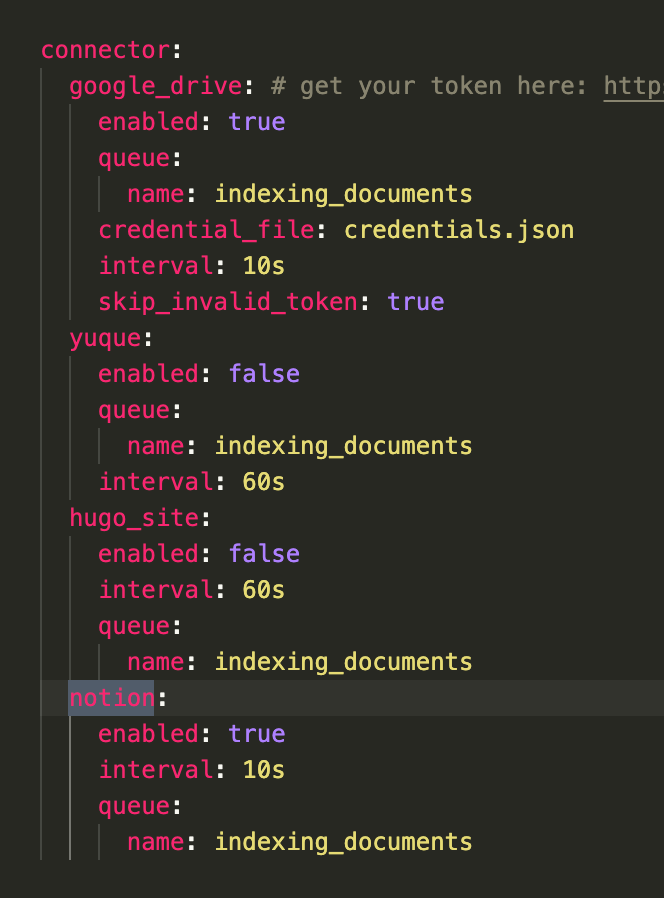
print(response_notion)修改 Notion 配置文件,激活检索 Notion:
在 Notion 这个网站申请 API key,https://www.notion.so/profile/integrations
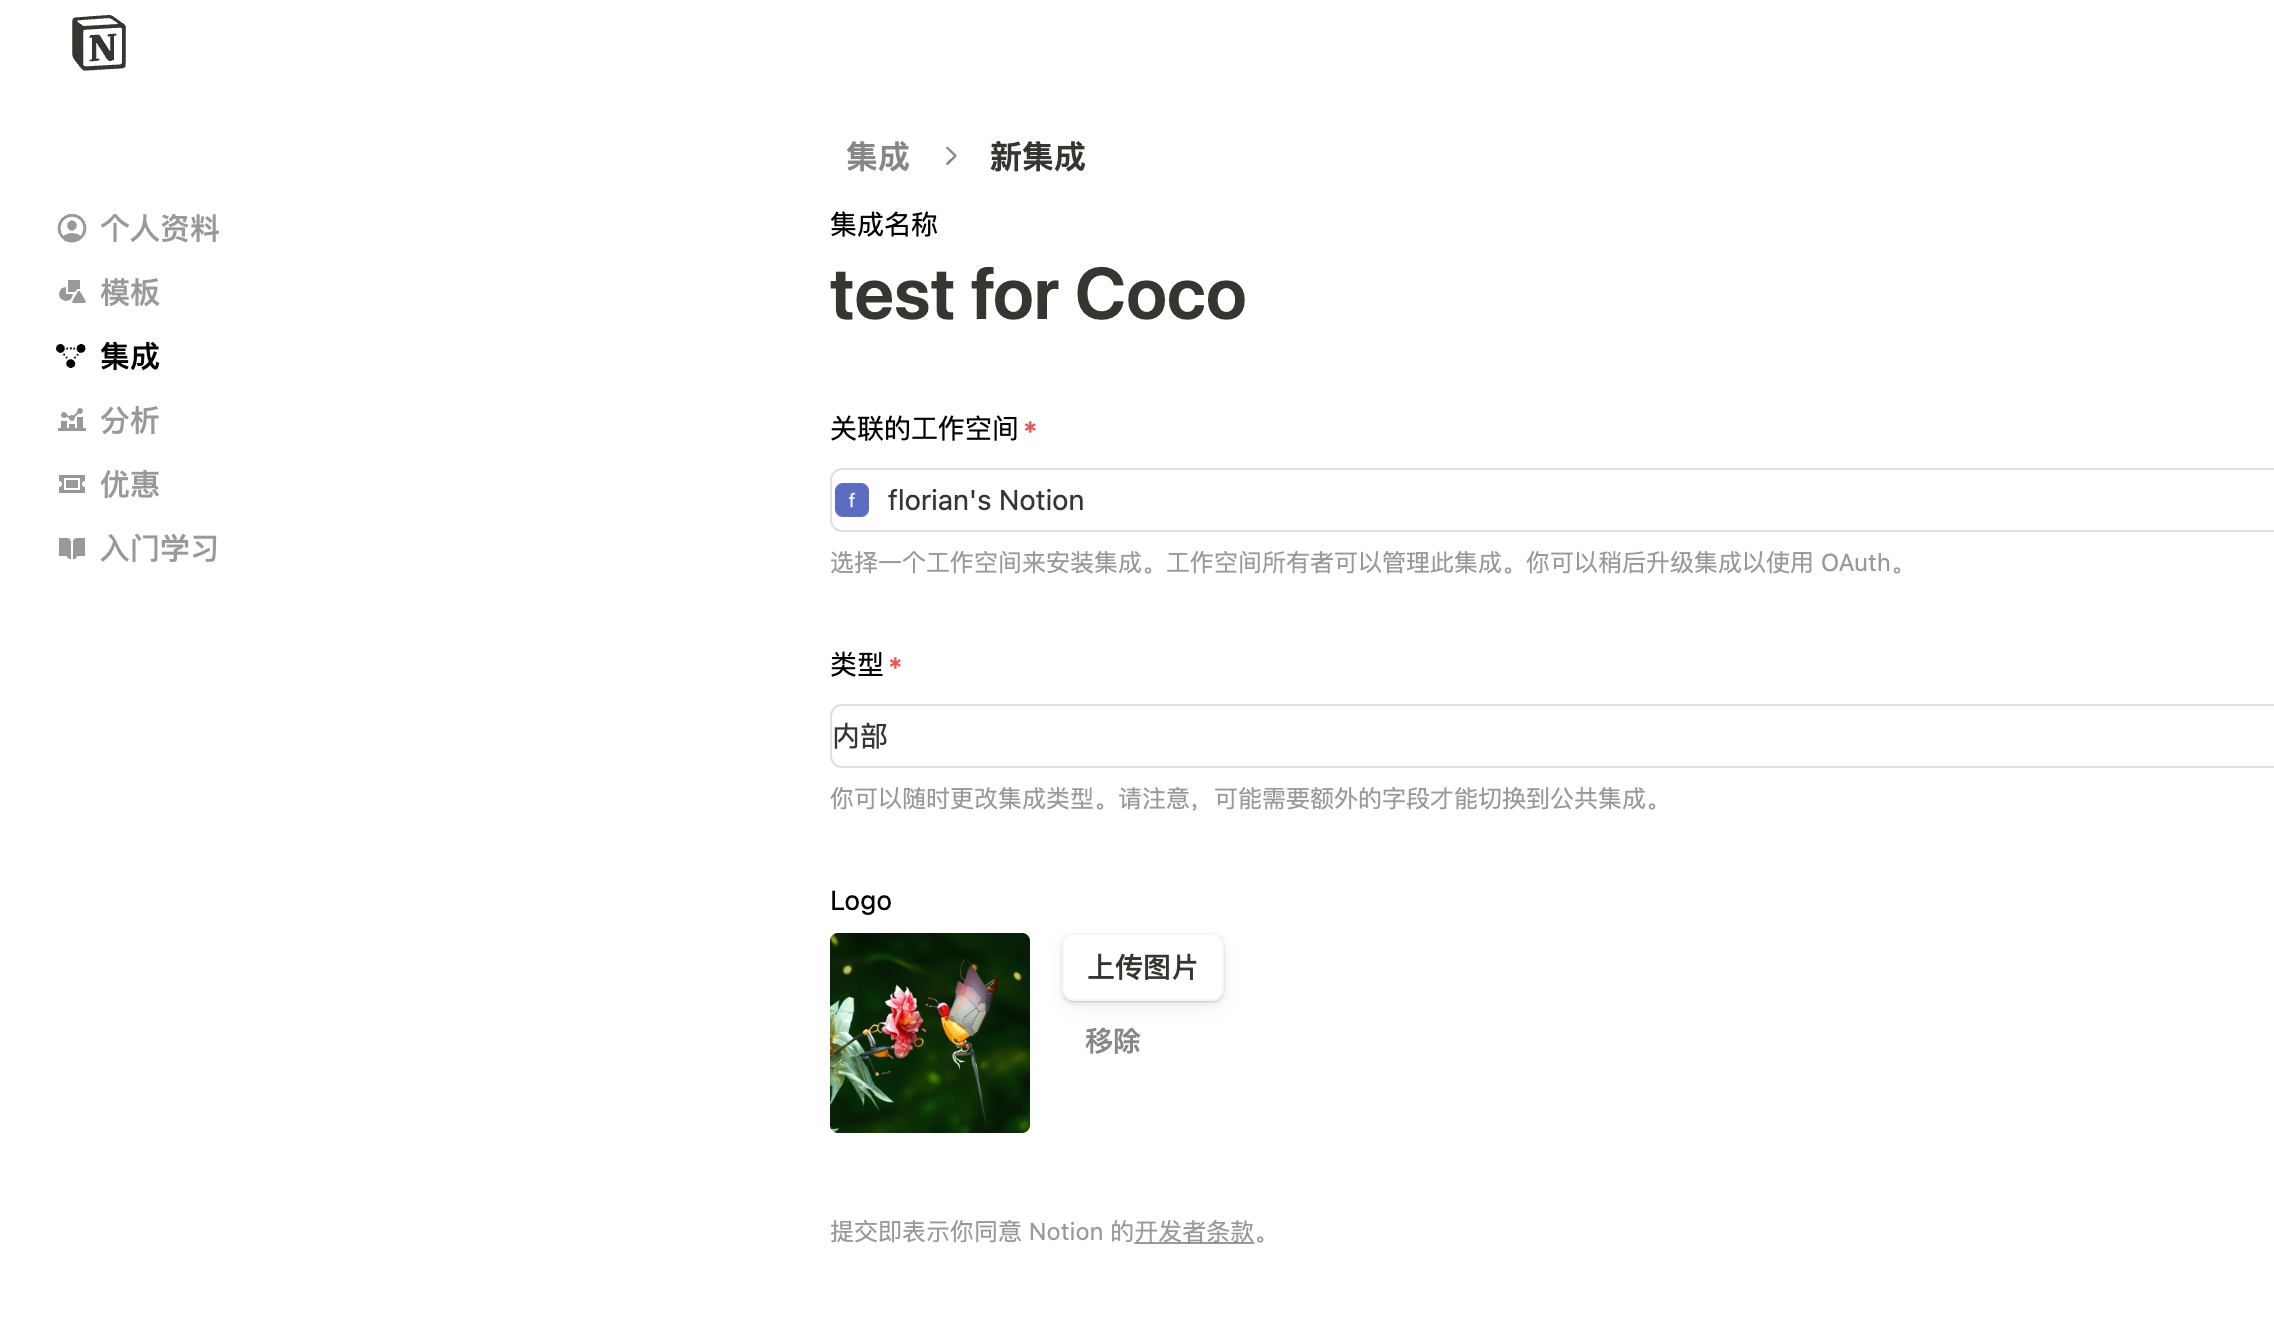
配置完成之后,设置权限和展示 apikey
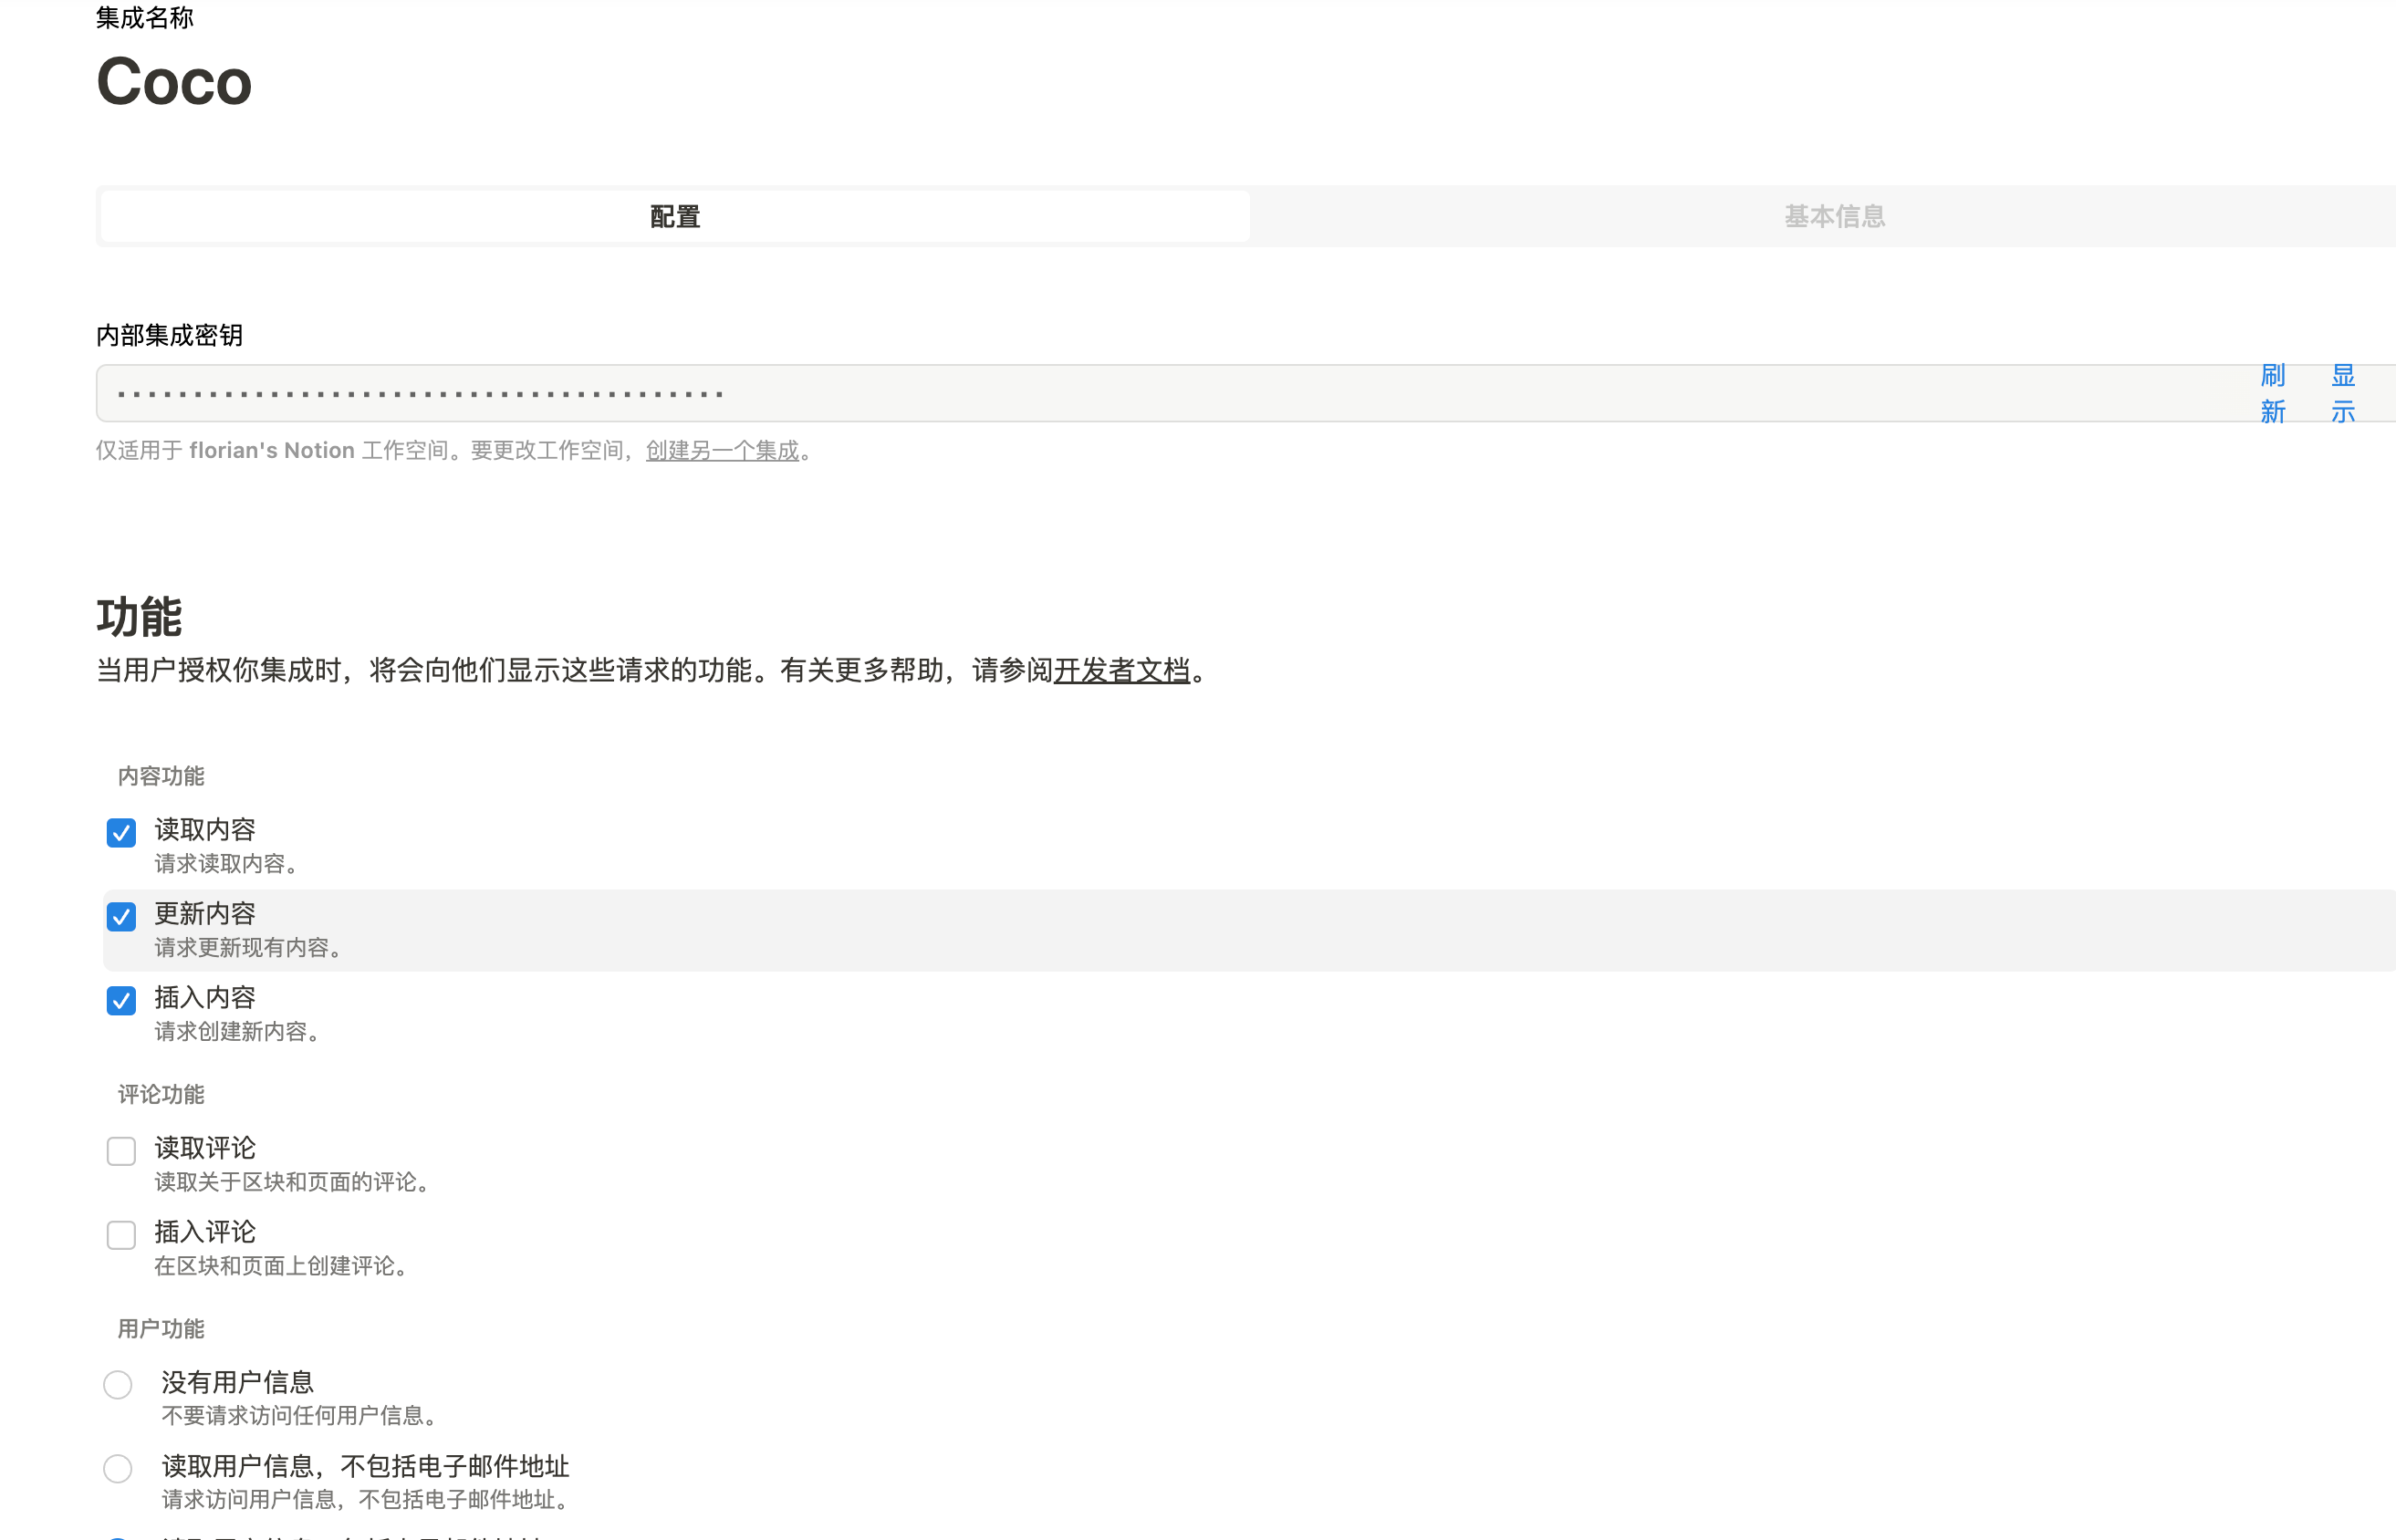
配置 Notion Connector,这里需要用到 Notion 的 API Key:
python
import requests
import json
def create_datasource(base_url, api_token, data):
url = f"{base_url}/datasource/"
headers = {
"X-API-TOKEN": api_token,
"Content-Type": "application/json"
}
response = requests.post(url, headers=headers, data=json.dumps(data))
return response.json()
# 示例输入
base_url = "http://localhost:9000"
api_token = "<api-key>"
datasource_data = {
"name": "My Notion",
"type": "connector",
"connector": {
"id": "notion",
"config": {
"token": "<notion token>"
}
}
}
# 发送 POST 请求
response = create_datasource(base_url, api_token, datasource_data)
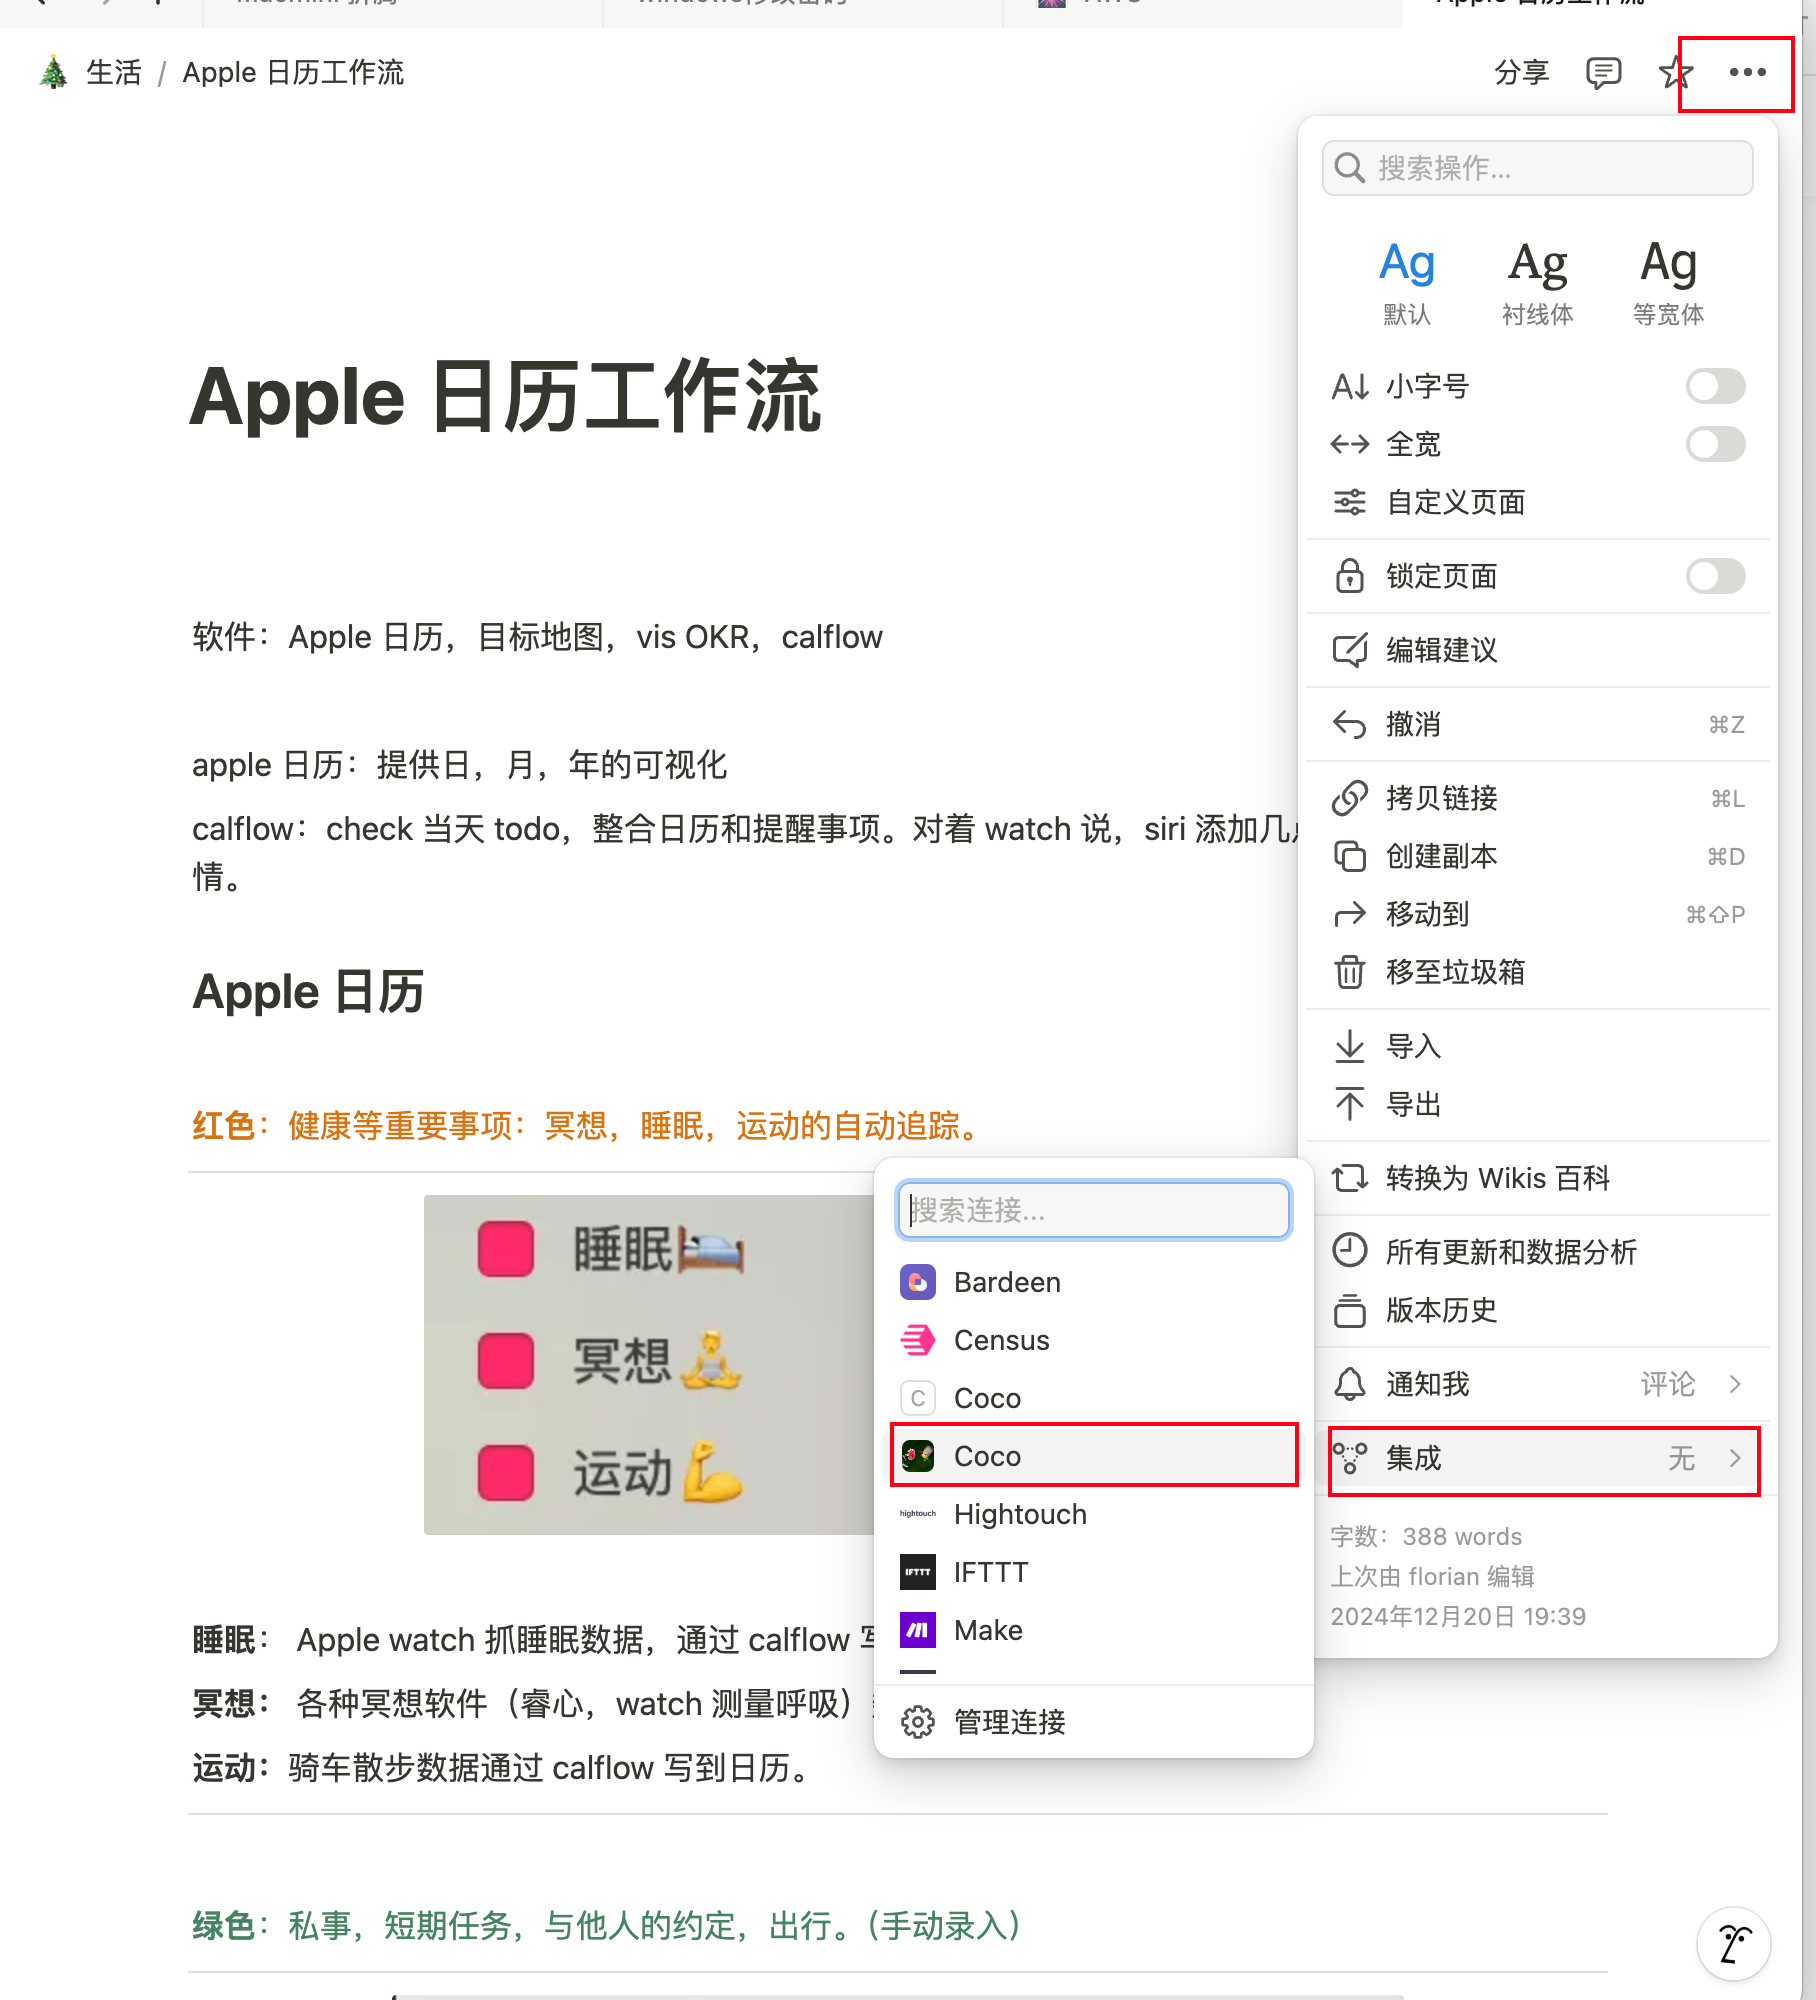
print(response)需要在 Notion 中设置集成,这样 Coco Server 才会搜索到:
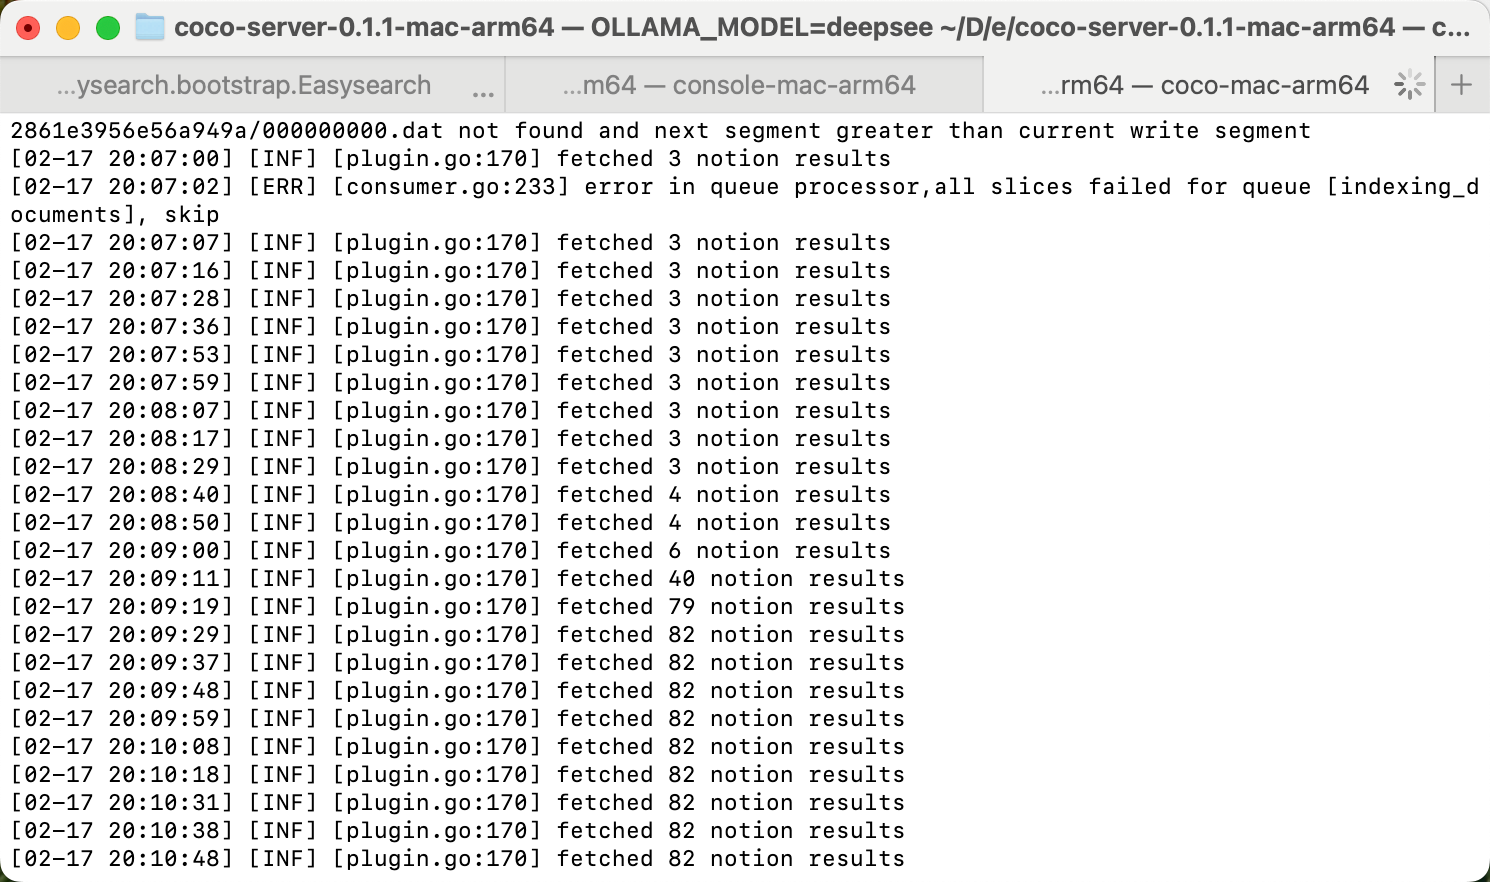
Coco server 日志中可以检索到 notion 了:
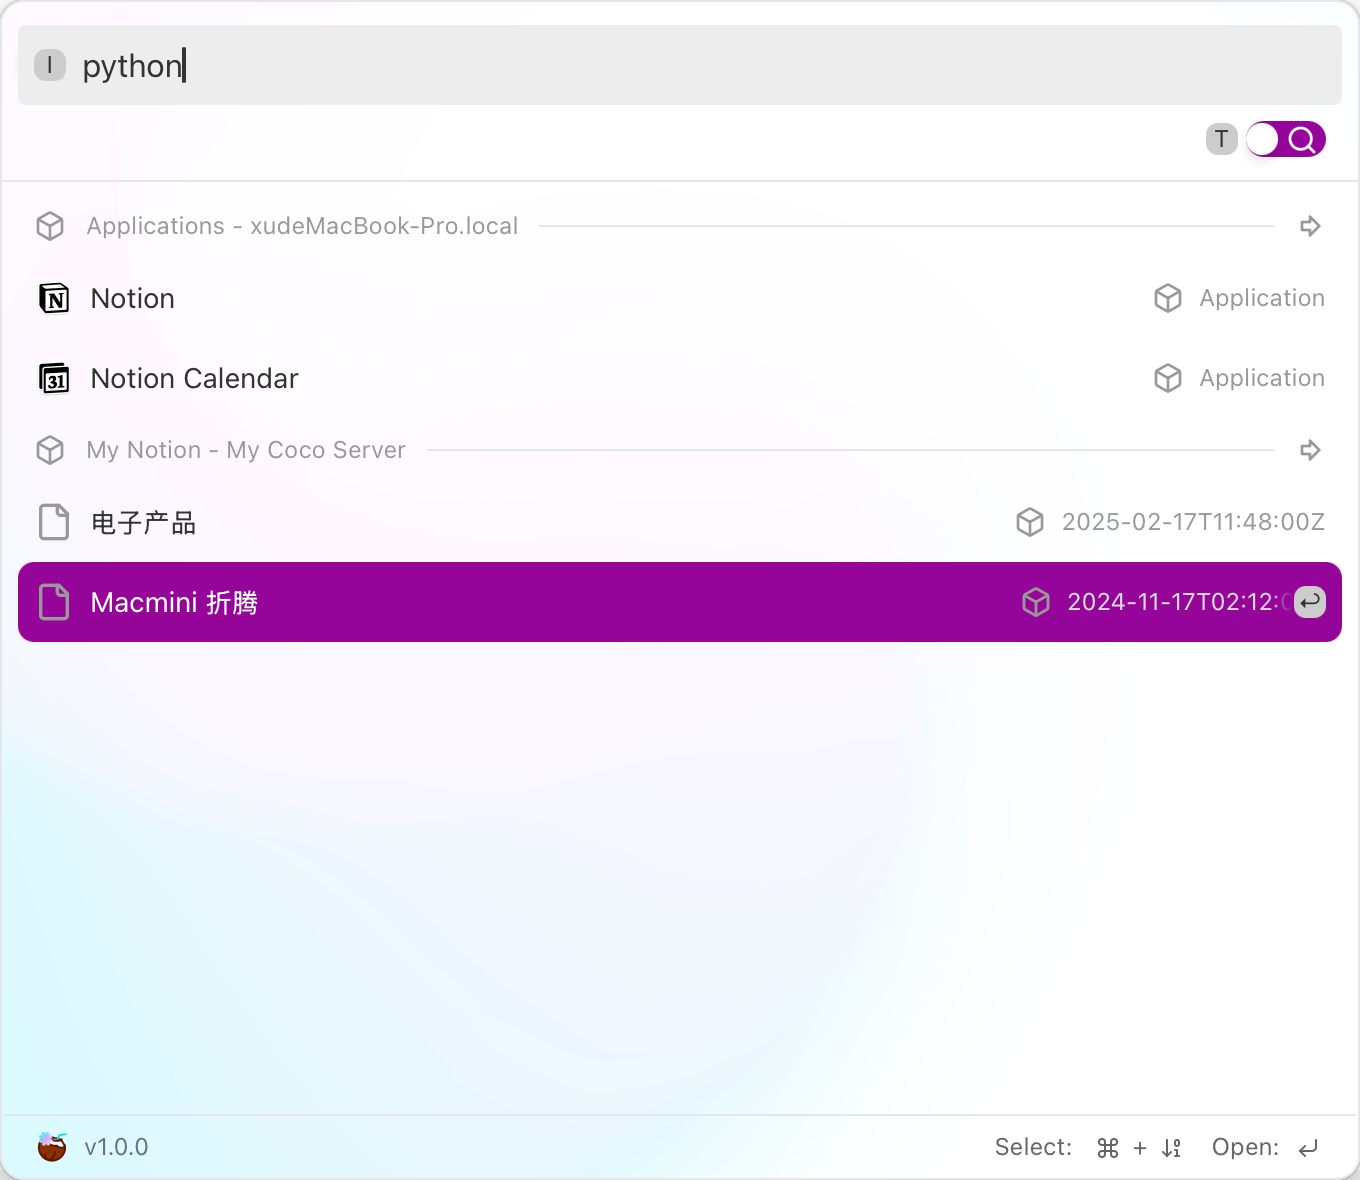
终于可以在搜索栏检索到了。